
How to Sew a Clear Vinyl Zipper Pouch
- Jun 4
- 5 min read
Sew your own clear vinyl zipper pouch with this free, beginner-friendly tutorial.

A clear vinyl zipper pouch is one of those projects that looks harder than it actually is. This pouch comes together quickly, the steps are straightforward, and the finished result is impressive. It's a lovely project if you’re newer to sewing and want a quick win you can be proud of.
If you’ve been wanting to try sewing with clear vinyl but weren’t sure where to start, this is a great place to begin.
I've put together a full step-by-step video tutorial showing exactly how to make one from start to finish, or you can follow the written tutorial below. The video runs about six minutes with every step explained. Have it open beside you as you sew, or work from the written steps, whichever you prefer.
Safety note: This tutorial is for personal use and is intended for adults. It uses a sewing machine, needles and scissors. Please handle all tools with care and follow your machine’s safety instructions.
Copyright & Usage: This free tutorial is for personal use only. You’re very welcome to make pouches for yourself or as gifts, but please don’t copy, redistribute, or republish the tutorial elsewhere, or use it for commercial purposes. If you’d like to share it, please point people to my website so they can find it themselves. Thank you for respecting my work and supporting handmade.
Watch the Video Tutorial
Follow the Written Instructions
Everything you need to make your own pouch is below with a couple of handy tips first, then the materials and step-by-step instructions.
Two tips that make sewing with vinyl easy
Vinyl has a bit of a reputation for being tricky, but really there are just two things to know that make it completely manageable:
Use baking paper. Vinyl can stick to your machine and stop it from feeding smoothly. Placing a strip of baking paper underneath the vinyl lets it glide across the machine bed without sticking or dragging. You simply tear the paper away once the seam is done.
Use clips instead of pins. Pins leave permanent holes in vinyl, so reach for sewing clips instead. They hold everything together just as well, with no marks left behind. If you don't have sewing clips, clothes pegs are an alternative.
Once you know those two things, sewing with vinyl is no harder than sewing with fabric.
What you’ll need:
Clear vinyl (PVC) - 34 x 22 cm (13⅜ x 8⅝")
Zipper - 25 cm (10")
Grosgrain ribbon - 40cm x 2.5cm wide (15¾ x 1")
Sewing machine, thread and basic sewing tools
Sewing clips (or clothes pegs)
Baking paper (ideal, but optional)
I use grosgrain ribbon because it's strong, hardwearing, and easy to work with for binding, and its slight sheen sits nicely against the shiny vinyl. You can use pre-made binding instead if you prefer.
Finished size: approximately 22 x 16.5 cm (8⅝ x 6½").
Want a different size? You can make this pouch any size you like. Cut your vinyl to the width you want, by roughly twice the finished height, since the pouch is one piece folded in half. The main thing to get right is the zipper: once you've removed the ends and pull, it should be about 2.5cm (1") longer than the width of the pouch, so there's room to attach it and trim the ends neatly.

Step-by-step instructions
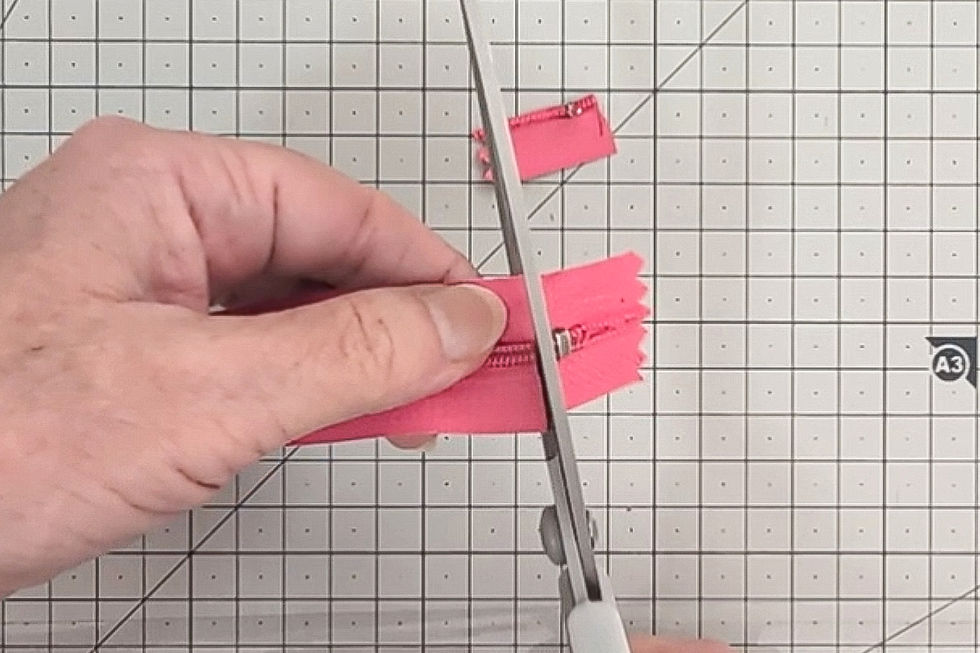
Step 1 - Prepare the zipper.
Make sure the zipper is closed, then cut the stoppers from each end and remove the zipper pull. Use an older pair of scissors for this, as the zipper teeth can make them blunt. If you’re using continuous zipper tape, you can skip this step.
Step 2 - Attach the first edge of the zipper.
With the zipper teeth facing down, centre the zipper along one short edge of the vinyl, aligning the top edge of the zipper tape with the edge of the vinyl, and clip in place. TIP: Place a strip of baking paper underneath the vinyl so it feeds smoothly through your machine.


Step 3 - Sew the first side of the zipper.
Using a zipper foot, sew about 3mm (⅛″) from the zipper teeth, then remove the baking paper.


Step 4 - Fold and topstitch.
Fold the vinyl back along the seam so the zipper teeth are now facing up, and finger press the fold. Topstitch close to the folded edge, gently guiding the vinyl away from the zipper teeth as you sew.


Step 5 - Attach the second edge.
Align the remaining short edge of the vinyl with the top edge of the zipper tape, teeth facing down. Clip in place and sew as before.


Step 6 - Open zipper and topstitch second edge.
Gently separate the zipper teeth at one end, then fully open the zipper. Fold and topstitch this end as you did the first end, then trim your threads.


Step 7 - Reinsert the zipper pull.
Lay the pouch flat with the zipper teeth facing down, then bring both sides of the zipper together so the teeth are on top. Hold the zipper pull with the curved end facing down, then insert one side of the tape, followed by the other, feeding both in evenly until the pull locks into place.


Step 8 - Close the zipper and trim.
Place the pouch on a flat surface and, holding the two ends of the zipper tape, gently slide the pull along to close the zipper, leaving it open about 4cm (1½″). Trim the zipper ends so they line up with the edge of the vinyl on each side.


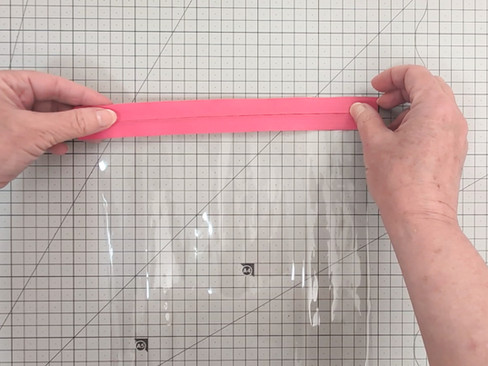
Step 9 - Prepare the binding.
Cut two lengths of grosgrain ribbon, each 20cm (8″) long. Position the pouch so the zipper teeth sit about 2.5cm (1″) from the top edge, and finger press the top and bottom folds to help them stay in place.


Step 10 - Fold and clip the binding.
With the front of the pouch facing up, centre one side edge on the wrong side of a piece of ribbon. Fold one end of the ribbon inwards, then fold the top section over the edge of the pouch. Clip in place and repeat for the other end, then do the same on the other side of the pouch.


Step 11 - Sew the binding and finish.
Sew along each side, about 3mm (⅛″) from the inner edge of the ribbon, going slowly over the zipper. Trim any threads.


Your pouch is now complete.

And there you have it - a finished pouch that looks impressive, made from a material that probably seemed intimidating before you started. Now you've made one, you'll likely want to make more!
If making this pouch has you wanting to try a few more zipper pouch projects, these two patterns are a natural next step and can be found, along with many other beginner patterns, in my Etsy shop via the button below:
Basic Zip Pouch - a set of four lined zip pouches in different sizes, with clear step-by-step photos throughout. A lovely way to build on what you’ve just learned.
Quilted Zipper Pouch - flat quilted pouches in four sizes, for when you’re ready to add a little texture and structure to your makes.
All of my patterns are beginner friendly with photo-rich instructions for every step, so you can sew with confidence.
Happy sewing 🧵
If you have any questions, please contact me at vicki@vickielle.com.au.


Comments